Meet(point,angle,point,angle). Using variables.
meet
point
apply
imaginary line
length property
sz
variables
.l
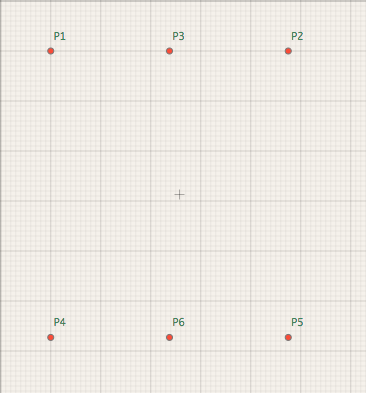
Last time we continued working on our basic skirt template and used commands "
point" and "apply".Here is the resulting code:
1
P1=point(10,10)2
P2=apply(P1,sz19+2,0)3
P3=apply(P1,[P1:P2].l/2,0)4
P4=apply(P1,sz7-sz9,90)5
P5=apply(P2,sz7-sz9,90)6
P6=apply(P3,sz7-sz9,90)The code looks fine, but the last two commands are an exact repetition of line 4.
It can be left like this, but in some cases this might be inconvenient. For example, if you decide to change the length of your skirt a few cm, you will have to edit lines 4, 5 and 6.
How can we make it better?
Option 1 - create a variable for the length of the skirt, and refer to it in every command.
1) Create a variable.
You can read more about variables in Sewist here, but all in all the principle is simple, just name a variable and describe it using an equation.
Names of variables should have no spaces, no dashes, first symbol shouldn't be a number, and you can't redefine size constants
sz and pi. For example, you can name your variable slngth or skirtlength, but you can't name it skirt length (a space here) or skirt-length (a dash or hyphen) or 1stlength (first symbol can't be a number).1
skirt_length=sz7-sz9Use it in code:
2
P1=point(10,10)3
P2=apply(P1,sz19+2,0)4
P3=apply(P1,[P1:P2].l/2,0)5
P4=apply(P1,skirt_length,90)6
P5=apply(P2,skirt_length,90)7
P6=apply(P3,skirt_length,90)
Now, if you decide the skirt is too long or too short, you only need to edit the first line, and the rest of the pattern will be adjusted automatically,
Option 2 - use the length of an imaginary line from P1 to P4 for the last two commands.
1
P1=point(10,10)2
P2=apply(P1,sz19+2,0)3
P3=apply(P1,[P1:P2].l/2,0)4
P4=apply(P1,sz7-sz9,90)5
P5=apply(P2,[p1:p4].l,90)6
P6=apply(P3,[p1:p4].l,90)In this case you only need to edit line 4 if you decide to change the skirt's length. However, the code is not very easy to read.
Option 3 - use the
meet command.Let's look at point P5. In a drafting manual, it would probably say - complete the rectangle by drafting a straight line down from point P2 and drafting a straight line to the right from point P4. This is exactly what command
meet can do. Here is the documentation on meet command and a Youtube video about meet command.
If we want to meet lines from P2 down and P4 to the right, we say:
P5 = meet(p2,90,p4,0)Angle of 90 degrees is downwards, and angle of 0 degrees is to the right.
We can now repeat it for point P6, using P3 and P4 as starting points. The resulting code will be:
1
skirt_length=sz7-sz92
P1=point(10,10)3
P2=apply(P1,sz19+2,0)4
P3=apply(P1,[P1:P2].l/2,0)5
P4=apply(P1,skirt_length,90)6
P5=meet(P2,90,P4,0)7
P6=meet(P3,90,P4,0)
"point", "apply" and "meet" are the main commands that one uses for placing points in Sewist. There are more complex commands such as "intercept" and "compass". We will look at them later in our advanced drafting lessons. Now we will proceed to finishing our skirt pattern, using curves and lines.
