Comment créer des patrons de couture dans Sewist CAD
bag
drafting
point
apply
meet
In this article I shall go through the drafting process for a simple bag.
I hope you have found some time to have a look at the first pages of our documentation and probably even watched the videos on points and lines.
Just in case, these video lessons might be useful for you:
| In today's lesson we are going to draw a very simple bag, and we shall make our pattern in such a way, that we can easily change the height, the width, and the depth of our bag. The pattern script is available at this link. You can view this code, play with it, but you won't be able to save the changes. So if you want to create your own pattern just like that, copy the code using this button  to a new pattern. to a new pattern. First of all, let us create several variables, that will be responsible for these parameters. In the pattern script window, I write the following lines of code: width=28height=24bottom=8And we can now set several points that will mark the outline of the bag. | 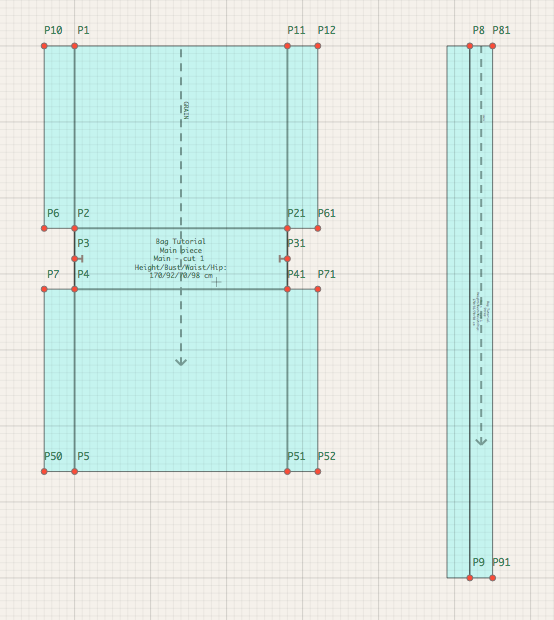 |
I shall start with the right side of the bag:
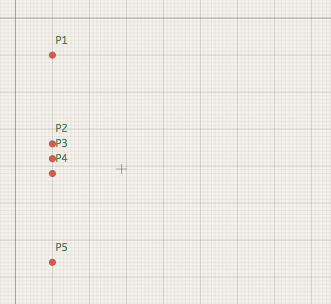 | p1=point(10,10) Put point P1 at 10 cm by x axis and 10 cm by y axis) p2=apply(p1,height,90) From point P1, apply height downwards, and put point P2) p3=apply(p2,bottom/2,90) From point P2, apply half of bottom downwards, and put point P3) p4=apply(p3,bottom/2,90) From point P3, apply half of the bottom downwards, and put point P4) p5=apply(p4,height,90) From point P4, apply height downwards, and put point P5) | |
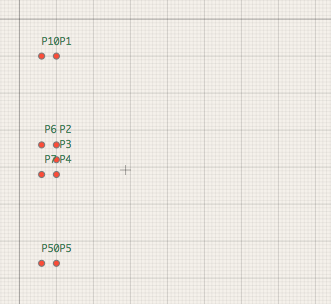 | p6=apply(p2,bottom/2,180) From point P2, apply half of bottom to the left, and put point P6) p7=apply(p4,bottom/2,180) From point P4, apply half of bottom to the left, and put point P7) p10=meet(p1,180,p6,-90) Draw a line to the left from point P1, and draw a line upwards from P6. Where these lines intercross, put point P10.) p50=meet(p5,180,p6,90) Draw a line to the left from point P5, and draw a line downwards from P6. Where these lines intercross, put point P50.) |
And now I will use the meet function to draft the left side of the bag. First, I shall apply width from P1 and place point P11. Then I'll place all points at this width at the level of the points P2-P5.
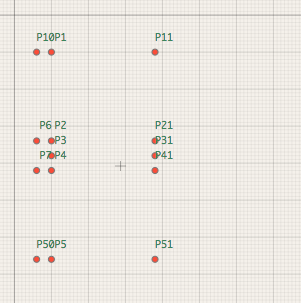 | p11=apply(p1,width,0) From point P1, apply width to the right, and put point P11) p21=meet(p2,0,p11,90) Draw a line to the right from point P2, and draw a line downwards from P11. Where these lines intercross, put point P10.) p31=meet(p3,0,p11,90) Draw a line to the right from point P3, and draw a line downwards from P11. Where these lines intercross, put point P10.) p41=meet(p4,0,p11,90) Draw a line to the right from point P4, and draw a line downwards from P11. Where these lines intercross, put point P10.) | |
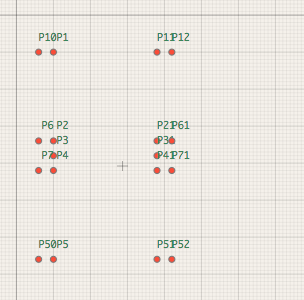 | Now let us add for the bottom and the side on the left part of our bag pattern. It is all very similar to the right side. p61=apply(p21,bottom/2,0) From point P21, apply half of bottom to the right, and put point P61) p71=apply(p41,bottom/2,0) From point P41, apply half of bottom to the left, and put point P71) p12=meet(p11,0,p61,-90) Draw a line to the right from point P11, and draw a line upwards from P61. Where these lines intercross, put point P12.) p52=meet(p51,0,p61,90) Draw a line to the right from point P51, and draw a line downwards from P61. Where these lines intercross, put point P52.) |
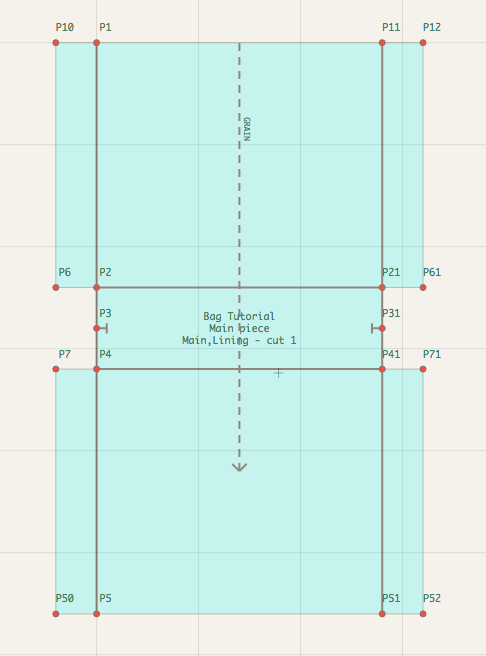
mark(p3,0)
mark(p31,180)
And now I am ready to trace my pattern. It is not necessary to create lines between points, as they will be created automatically. In the tracing contour of a pattern all points that are listed are connected with straight lines.
pattern(
name("Main piece"), // name of our pattern block
trace(P10,P12,P61,P21,P41,P71,P52,P50,P7,P4,P2,P6), // all the points clockwise, both outer and inner corners
qty(1, 0), // we'll need just one piece
fabric("Main","Lining"), // from both main fabric and lining
inc((p1,p5),(p11,p51),(p2,p21),(p4,p41)), // we want the pattern to include lines P1-P5, P11-P51, P2-P21, P4-P41
grain(90), // the grain direction is from top to bottom
color("cyan")
)
Here's the resulting pattern piece on the drafting screen:
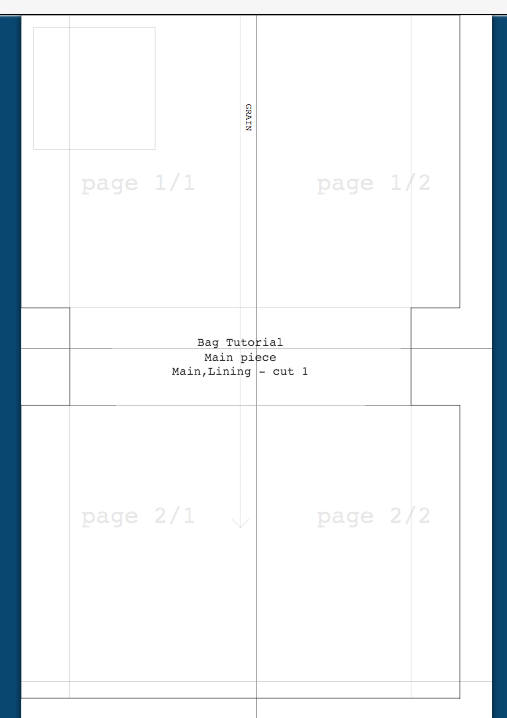
And in the print preview on A4 pages:
Now, remember we created variables for width, height and bottom when we started drafting this pattern? Let's change them and see what happens :)
width=21
height=13
bottom=4
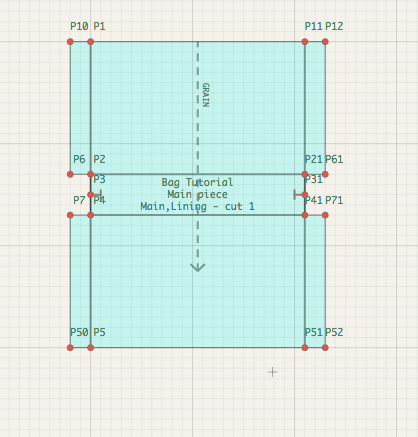
width=20
height=35
bottom=6

That is the best part of the parametric drafting. After describing a pattern script, getting a resized pattern is a matter of seconds.
For accessories, like this bag, you can change variables in your code.
And for garments you will be changing the size, but the principle is the same. You only draft once to get patterns for all the sizes, without extra grading.