Selecting Your Size: RTW, ISO, and Made-to-Measure Options in PRO Mode of Sewist CAD
When you enter PRO mode and load a sewing pattern, it's important to know that the sewing pattern will initially be displayed in a standard size. This means that the sewing pattern's measurements are based on a default size and may not match your specific body measurements right away. Don't worry! You have the flexibility to choose a size that will suit you.
Here's a step-by-step guide to help you select the right size for your sewing pattern:
Where to Check the Current Size:
On the right side of the screen, you'll find the main size measurements displayed. These measurements serve as a reference for you to compare with your own body measurements.

How to Change Size:
To select the correct size, look for the button with an icon representing size selection -  - and click on it. This will open a menu with different size options.

RTW Sizes:
The first tab displays ready-to-wear (RTW) sizes, which are standard clothing sizes commonly found in stores. They are all based on a total height of 168 cm (5 feet 5 inches). Choose the RTW size that closely matches your body measurements as a starting point.
ISO Sizes:
The second tab contains ISO sizes, which are a standardized set of measurements used internationally to categorize clothing sizes. Unlike generic labels like small, medium, or large, ISO sizes are based on specific body measurements, ensuring a more accurate and personalized fit. They provide a consistent sizing system across countries, making it easier to find sewing patterns that align with your measurements. By using ISO sizes, you can confidently create garments that fit you beautifully and express your unique style. Here's how to select an ISO size in Sewist CAD:
Total Height: Begin by selecting your total height measurement. This is the vertical distance from the top of your head to the soles of your feet. The ISO size chart will provide options for each height range.
Bust Girth: Once you've chosen your total height, you can then determine the options for bust girth that correspond to that height range. The bust girth measurement refers to the circumference around the fullest part of your chest. Select the bust girth measurement that aligns with your body to narrow down your size choices.
Hip Girth: After selecting the appropriate bust girth, you'll be presented with the available options for hip girth. The hip girth measurement represents the circumference around the fullest part of your hips. Choose the hip girth measurement that matches your body proportions.
Size Selection: Once you've clicked on the desired hip girth measurement, the corresponding size will be selected and applied to your sewing pattern. This ensures that the sewing pattern is tailored to your specific measurements, providing a more accurate and comfortable fit.
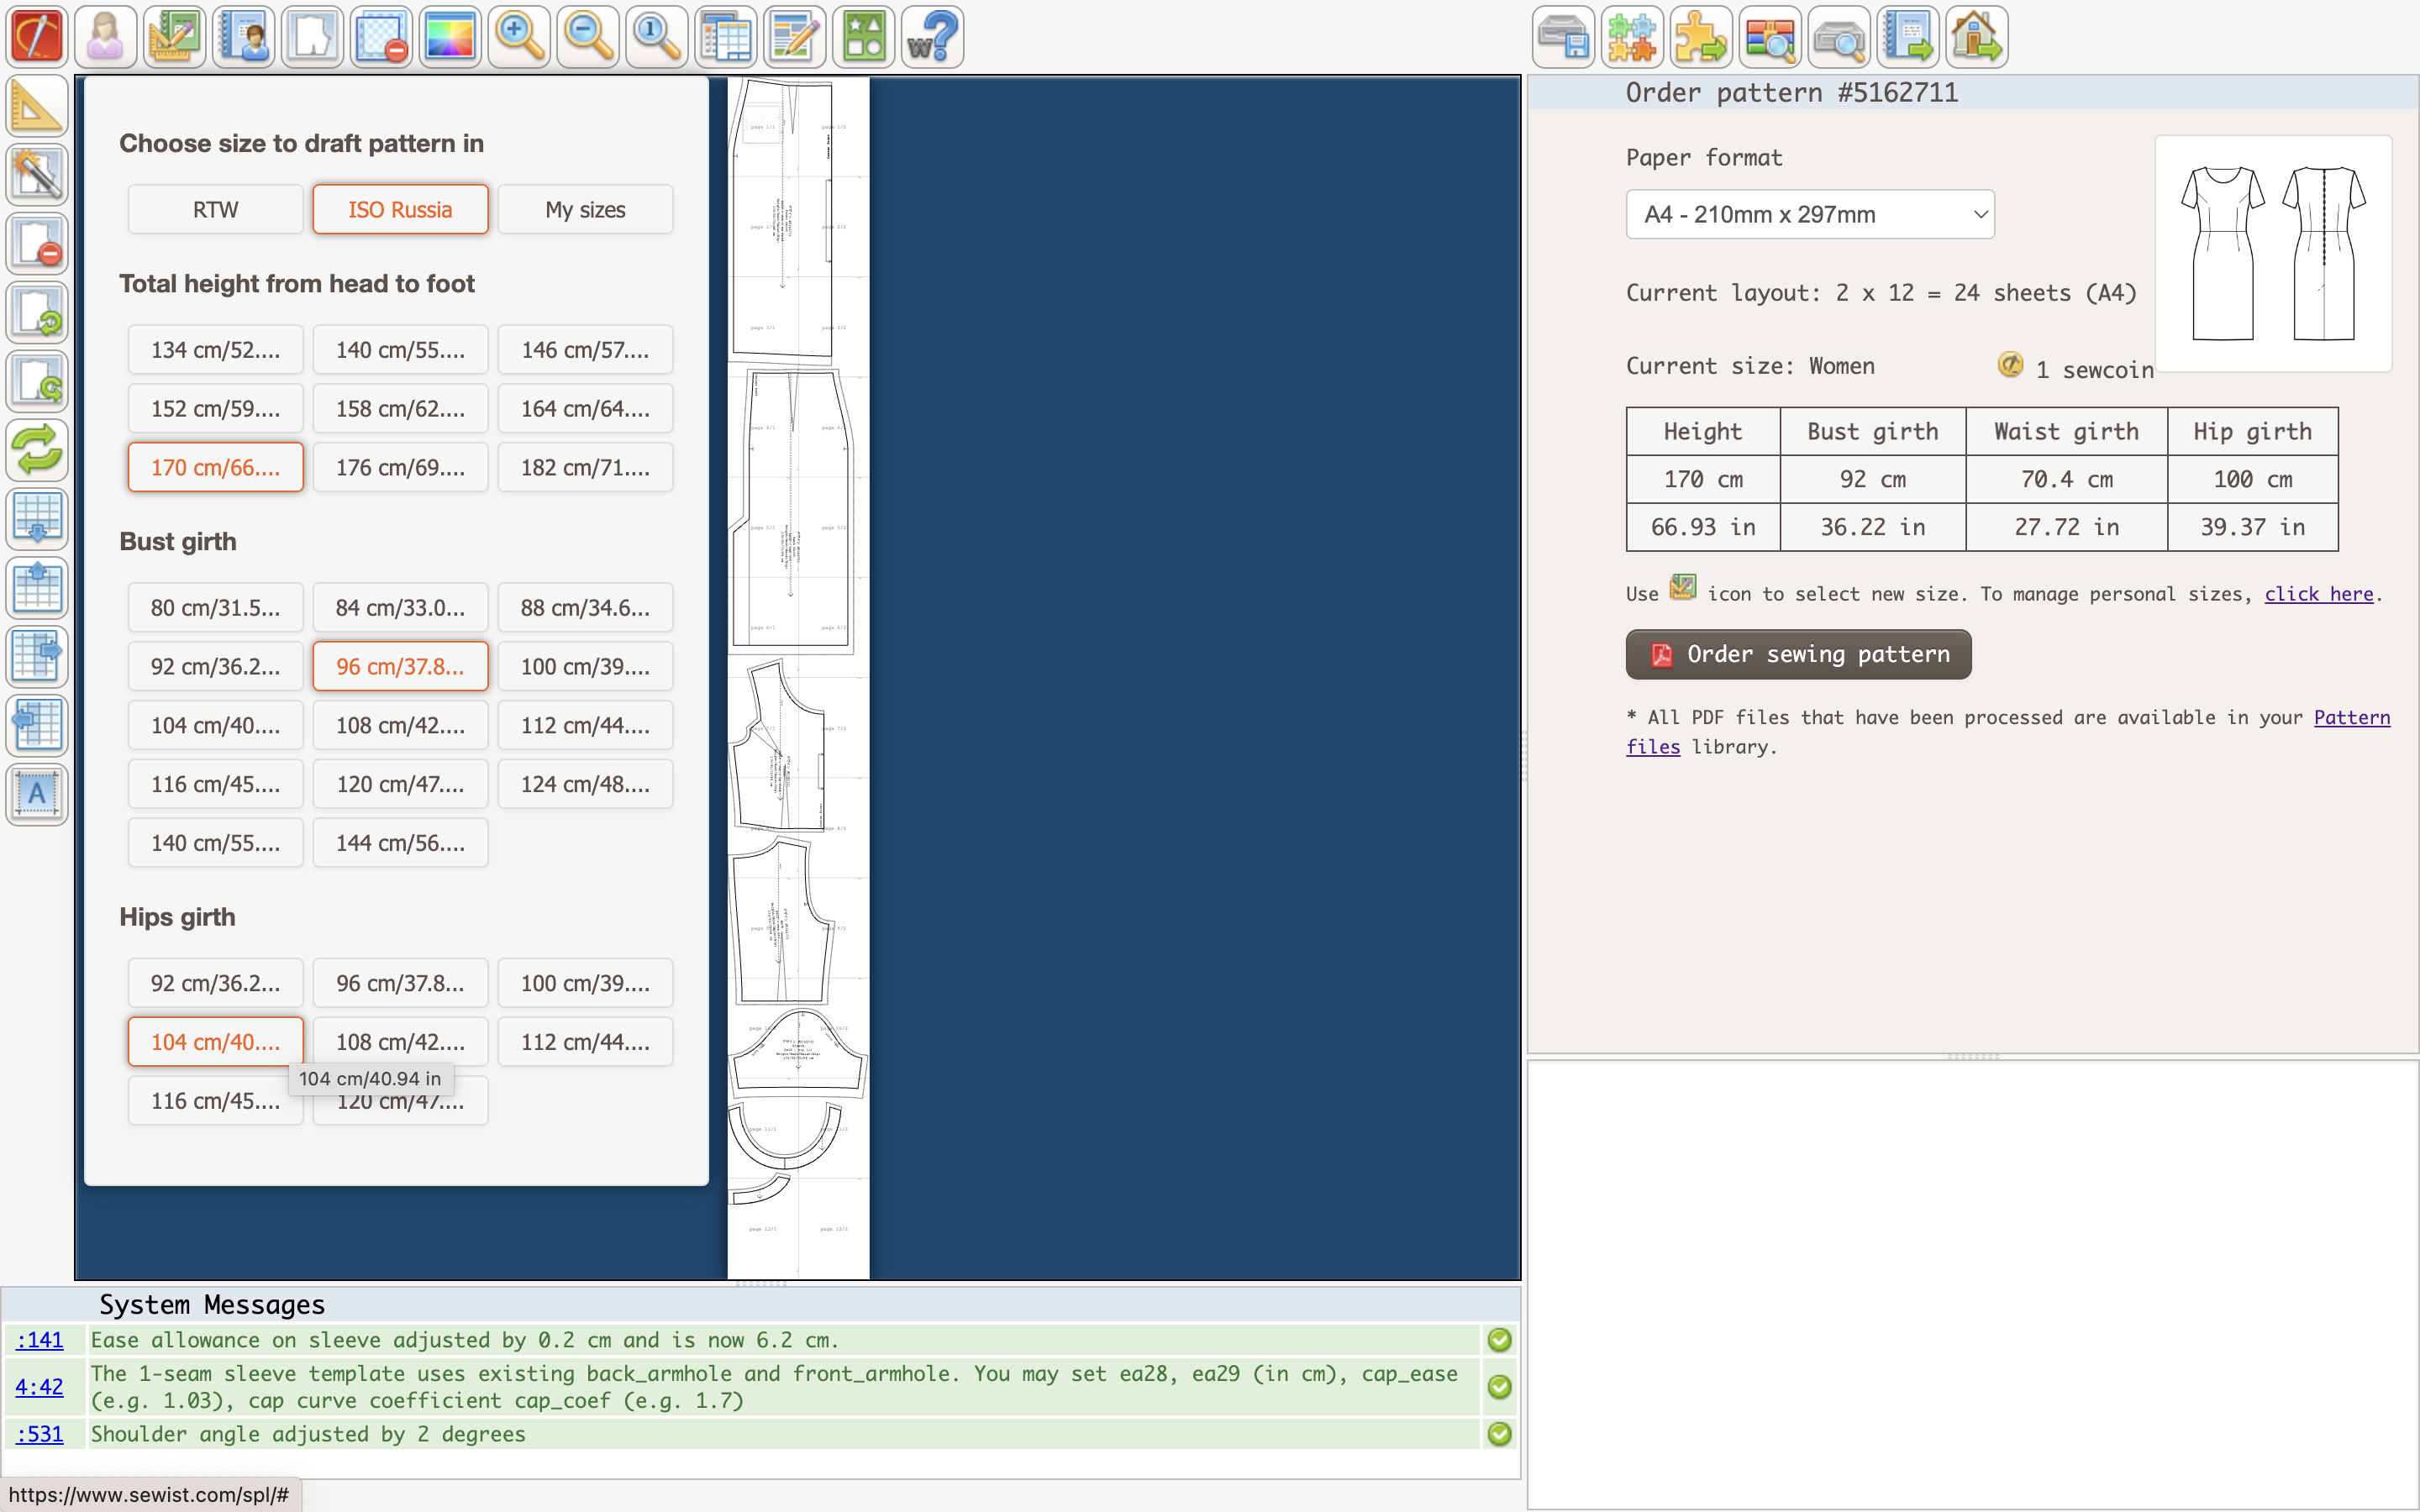
The step-by-step process of selecting the right ISO size may seem intricate at first as you navigate through different measurements. However, don't be discouraged if the ISO size arrangement seems unfamiliar initially. Embrace it as a practical and effective way to organize a multitude of sizes, providing you with a greater opportunity to find your ideal fit.
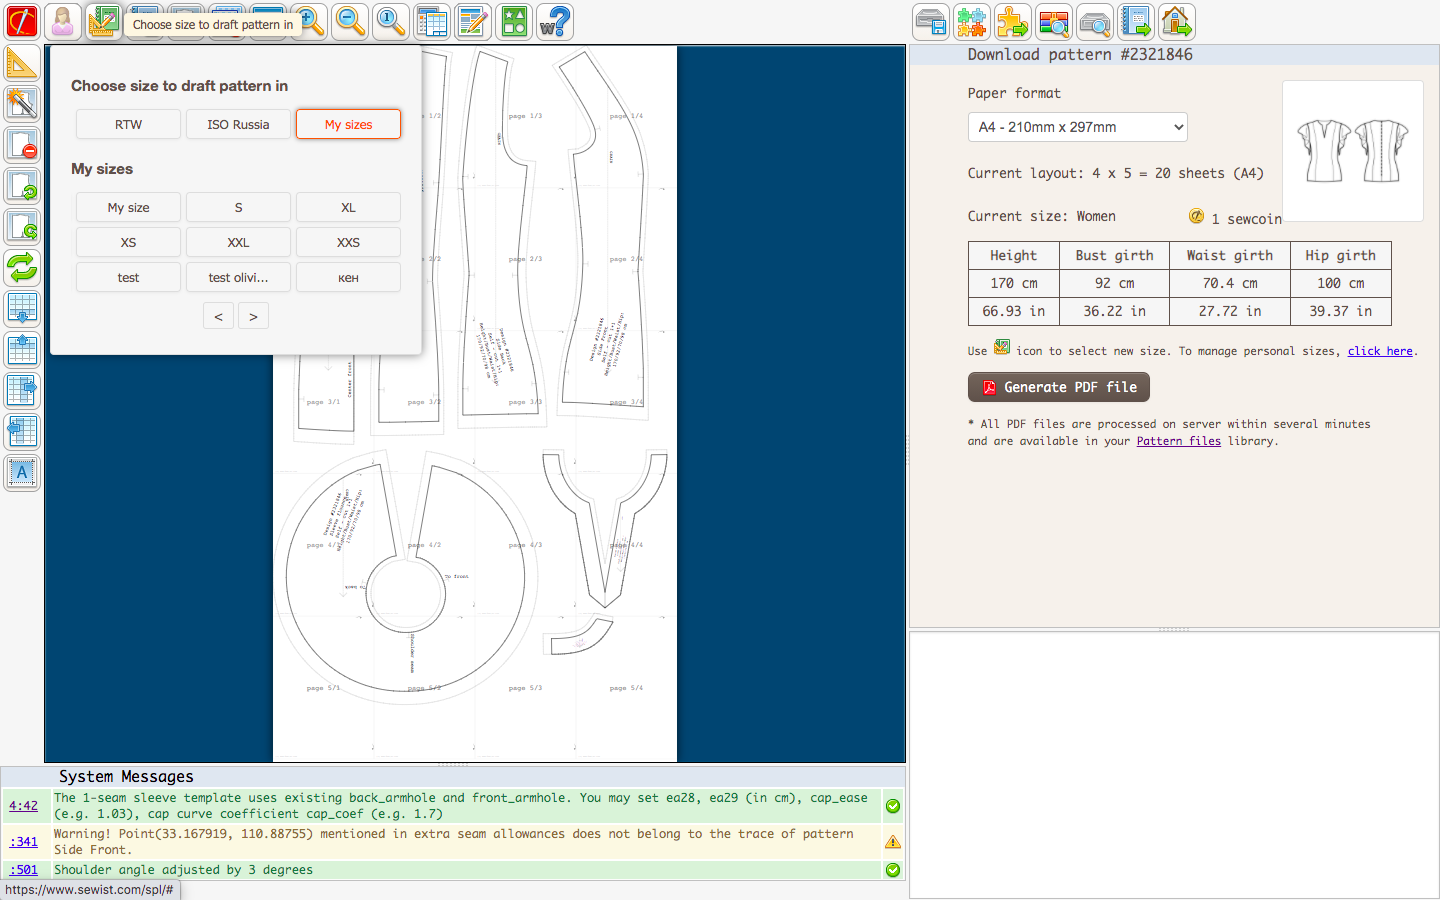
Your Individual Sizes for Made-to-Measure Sewing Patterns:
The third tab contains your personal sizes. If you have previously saved your own measurements, you can access them on the third tab. If you need to add or update your personal measurements, click on the Manage sizes link. Follow the instructions provided to input and save your measurements accurately. Once you have saved a size, refresh the page, and it will appear on the third tab of the Sizes menu.
Complete Size Information Before the Purchase:
To make your size selection journey even more convenient and detailed, there is the icon  . By clicking on this icon, a PDF will open in a new window containing an incredibly detailed list of all size measurements calculated for the specific set of main girths and heights. This comprehensive resource includes over a hundred measurements, complete with explanations on how to take them and helpful diagrams. The best part? It's absolutely free and available for you to access before making a purchase.
This invaluable PDF resource provides you with a wealth of information to ensure precise measurements and a customized fit for your sewing projects. It's a valuable tool for both beginners and experienced sewists, offering guidance and clarity throughout the sizing process. So, along with exploring the ISO sizes and their organization, take advantage of this free PDF resource. It will enhance your understanding of the measurements involved and empower you to make well-informed decisions when selecting your size.