Распечатка выкройки дома или в типографии
Когда дело доходит до выбора формата печати для вашей выкройки, вам не нужно беспокоиться! Мы предлагаем различные варианты, чтобы упростить вам задачу.
Для обеспечения идеальной посадки мы с радостью предоставляем неограниченное количество копий нашей бесплатной выкройки, чтобы вы могли протестировать различные форматы. Это особенно рекомендуется, если вы планируете импортировать выкройку в программное обеспечение или посетить копировальный центр. Это удобный способ исследовать наш дизайнер и найти наиболее подходящий формат для ваших нужд.
Пожалуйста, обратите внимание, что каждый заказ будет включать следующие файлы:
- PDF: Файл выкройки для печати.
- SVG: Файл SVG, который можно импортировать в выбранное вами программное обеспечение.
- Файл AR Viewer: Этот инновационный файл позволяет использовать дополненную реальность для проецирования выкройки на ткань без необходимости её печати. Просто используйте камеру своего телефона, чтобы нанести выкройку непосредственно на ткань. Это отличный и экономичный вариант для всех портных.
Теперь давайте перейдем к форматам печати:
ШАГ 1. ВЫБЕРИТЕ ПРАВИЛЬНЫЙ ФОРМАТ.
При заказе выкройки важно выбрать подходящий формат для печати. Мы предлагаем различные форматы печати, чтобы удовлетворить разные потребности. Вот доступные форматы:
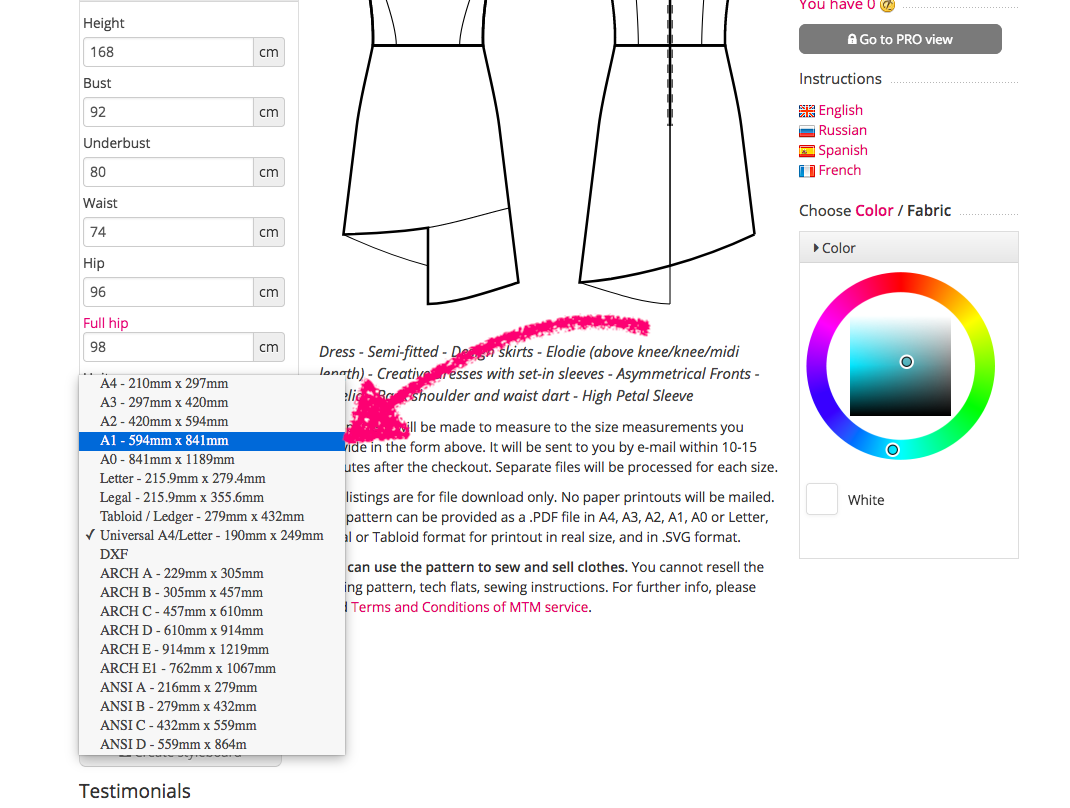
- Универсальный формат:
- Универсальный A4/Letter (совместимый с большинством домашних принтеров, с немного более широкими полями): Этот формат подходит для печати на любом домашнем принтере, независимо от используемого формата бумаги A4 или Letter.
- <
b>Принтеры для дома:
- A4: 210 мм x 297 мм (8.3" x 11.7") - Стандартный формат бумаги, используемый во многих странах мира.
- Letter: 215,9 мм x 279,4 мм (8.5" x 11") - Формат бумаги, обычно используемый в США и Канаде.
- Без полей:
- A4 без полей: Не нужно обрезать поля после печати.
- Letter без полей: Не нужно обрезать поля после печати.
- Форматы для копировальных центров (большие форматы):
- A2: 420 мм x 594 мм (16.5" x 23.4")
- A1: 594 мм x 841 мм (23.4" x 33.1")
- A0: 841 мм x 1189 мм (33.1" x 46.8")
- ARCH A: 229 мм x 305 мм (9" x 12")
- ARCH B: 305 мм x 457 мм (12" x 18")
- ARCH C: 457 мм x 610 мм (18" x 24")
- ARCH D: 610 мм x 914 мм (24" x 36")
- ARCH E: 914 мм x 1219 мм (36" x 48")
- ARCH E1: 762 мм x 1067 мм (30" x 42")
- ANSI A: 216 мм x 279 мм (8.5" x 11")
- ANSI B: 279 мм x 432 мм (11" x 17")
- ANSI C: 432 мм x 559 мм (17" x 22")
- ANSI D: 559 мм x 864 мм (22" x 34")
- ANSI E: 864 мм x 1118 мм (34" x 44")
- Формат DXF:
- DXF: Этот формат специально разработан для импорта в программное обеспечение.
Обратите внимание, что при работе с форматом файла DXF необходимо сначала скачать бесплатную выкройку и проверить, может ли она быть успешно импортирована в ваше конкретное программное обеспечение. Стандарты программного обеспечения могут развиваться, и возможно, ваше программное обеспечение может потребовать формат DXF AAMA. Рекомендуется всегда проверять совместимость перед продолжением работы с файлом DXF.
- DXF: Этот формат специально разработан для импорта в программное обеспечение.
Помните, что каждый формат имеет свои преимущества, и вы можете выбрать тот, который подходит для ваших нужд. Не забудьте, что с каждым заказом вы также получите файл SVG для импорта в программное обеспечение и файл AR Viewer.
ШАГ 2. РАСПЕЧАТАЙТЕ ФАЙЛ.
Чтобы открыть свою PDF-выкройку, используйте программное обеспечение Adobe Reader. Вы можете бесплатно скачать Adobe Reader по следующей ссылке: https://get.adobe.com/reader/.
Ваша индивидуальная выкройка придет в виде многостраничного PDF-файла. Первая страница будет показывать раскладку деталей выкройки на последующих страницах. В то время как программа оптимизирует размещение для минимизации неиспользуемого пространства, все же могут быть незанятые страницы. Вы можете выбрать не печатать эти пустые страницы и печатать только заполненные. При печати выкройки установите масштаб настройки на "Без масштаба" или "100% масштаб", в зависимости от модели вашего принтера.
Рекомендуется сначала распечатать первую страницу и проверить, чтобы стороны квадрата были точно 10 см. Нижний край квадрата также имеет дюймовую шкалу. Если измерения кажутся меньше или больше, отрегулируйте настройки масштабирования, пока не достигнете желаемых измерений.
Обратите внимание, что вокруг фактической площади страницы могут быть рамки, что является нормальным. Обратите внимание на расположение содержимого файла на странице, особенно если вы выбрали универсальный формат A4/Letter. Этот формат включает только область печати, а принтер добавляет поля. При необходимости вы можете центрировать область печати, используя расширенные настройки принтера.
ШАГ 3. РАЗМЕСТИТЕ ЛИСТЫ В ПРАВИЛЬНОМ ПОРЯДКЕ.
Вы получите отдельный файл с инструкцией, который содержит раскладку страниц выкройки. Этот файл содержит пронумерованную диаграмму, показывающую порядок размещения страниц. Кроме того, на диаграмме отображаются черновые линии деталей выкройки, которые будут нарисованы на каждой странице.
Обрежьте верхний и/или правый край страниц там, где вы видите символы ножниц. В центре каждой страницы вы найдете номер, указывающий строку и столбец, разделенные косой чертой (/). Используйте эти метки для раскладки страниц. Например, страницу, помеченную как 2/3, следует разместить во втором ряду и третьем столбце.
Форматы без полей для многостраничных файлов:
Если вы заказали формат без полей, вам не нужно обрезать поля на бумаге. Вместо этого вы можете просто склеить страницы прямо после печати. Даже если ваш принтер не поддерживает печать без полей, только несколько миллиметров линий будут невидимыми. Вы легко можете исправить это на бумаге или при вырезании выкройки.

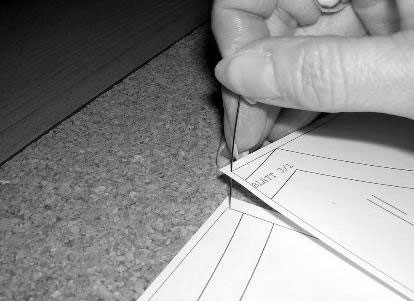
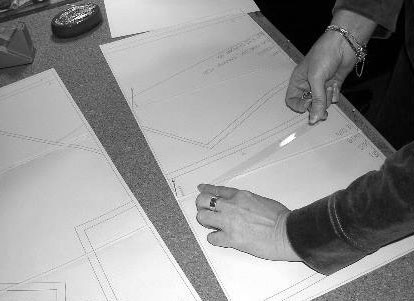
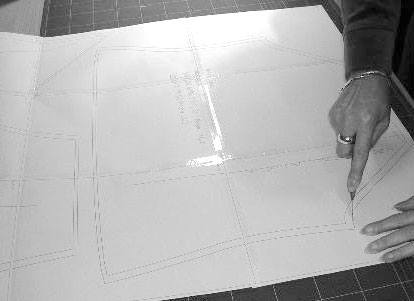
ШАГ 4. СОБЕРИТЕ ЛИСТЫ ВМЕСТЕ.
Для точной сборки рекомендуется использовать пробковый лист или лист пенопласта. Положите пробковый или пенопластовый лист на прочную поверхность, такую как стол, и поместите листы, которые нужно прикрепить, сверху. Соедините углы рамок на страницах выкройки и проткните их булавкой. Это поможет сохранить листы выкройки плоскими на поверхности и предотвратит их смещение.
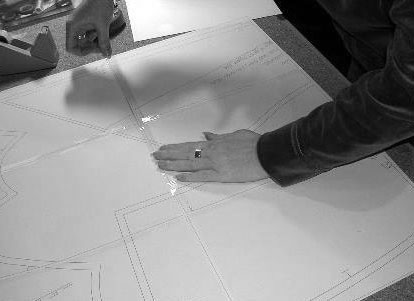
ШАГ 5. НАЛОЖИТЕ СКОТЧ.
После сопоставления и прикрепления листов, соедините их с помощью скотча вдоль всей соединенной кромки. Таким образом, вы надежно объедините страницы выкройки в единое целое.
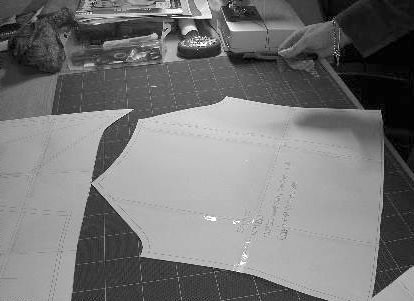
ШАГ 6. ВЫРЕЖЬТЕ ВЫКРОЙКУ.
Теперь у вас есть один большой лист бумаги с нарисованными на нем деталями выкройки. Используйте ножницы или круглый нож, чтобы аккуратно вырезать отдельные детали выкройки по обозначенным линиям.
Удачного шитья!