Printing out sewing patterns at home or at a printshop
When it comes to selecting a printing format for your sewing pattern, there's no need to worry! We provide different options to make it easy for you.
To ensure the perfect fit, we're delighted to offer unlimited copies of our free sewing pattern for you to test out various formats. This is especially recommended if you plan to import the pattern into software or visit a copyshop. It's a friendly way for you to explore and find the most suitable format for your needs.
Please note that every order will include the following files:
- PDF: The sewing pattern file for printing.
- SVG: An SVG file that can be imported into the software of your choice.
- AR Viewer File: This innovative file allows you to use an augmented reality viewer to project the pattern onto fabric without needing to print it. Simply use your phone's camera to trace the pattern directly onto the fabric. It's a fantastic and cost-effective option for all sewists.
Now, let's proceed with the printing formats:
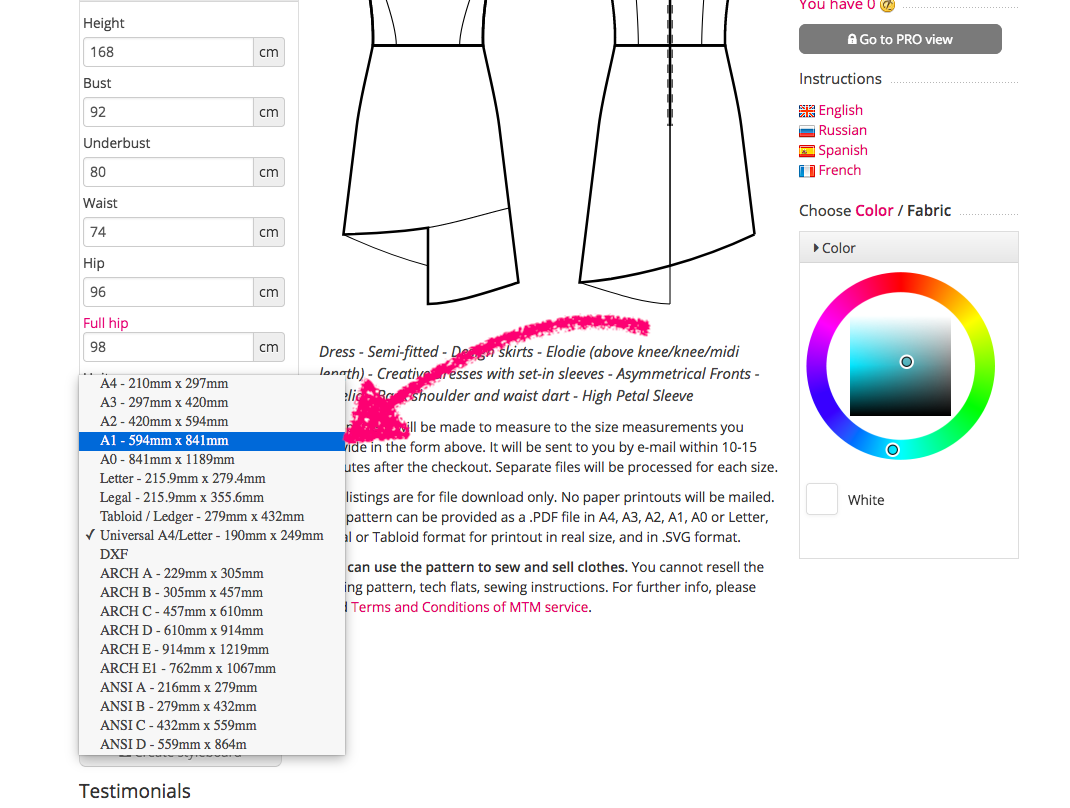
STEP 1. CHOOSE THE RIGHT FORMAT.
When ordering a sewing pattern, it's important to select the appropriate format for printing. We offer a variety of printing formats to accommodate different needs. Here are the available formats:
- Universal Format:
- Universal A4/Letter (compatible with most home printers, just with slightly wider margins): This format works well for printing on any home printer, whether it uses A4 or Letter paper size.
- Home Printers:
- A4: 210mm x 297mm (8.3" x 11.7") - The standard paper size used in many countries around the world.
- Letter: 215.9mm x 279.4mm (8.5" x 11") - The paper size commonly used in the USA and Canada.
- Trimless Formats:
- A4 Trimless: No need to cut away margins after printing.
- Letter Trimless: No need to cut away margins after printing.
- Copyshop Formats (larger formats for copy centers):
- A2: 420mm x 594mm (16.5" x 23.4")
- A1: 594mm x 841mm (23.4" x 33.1")
- A0: 841mm x 1189mm (33.1" x 46.8")
- ARCH A: 229mm x 305mm (9" x 12")
- ARCH B: 305mm x 457mm (12" x 18")
- ARCH C: 457mm x 610mm (18" x 24")
- ARCH D: 610mm x 914mm (24" x 36")
- ARCH E: 914mm x 1219mm (36" x 48")
- ARCH E1: 762mm x 1067mm (30" x 42")
- ANSI A: 216mm x 279mm (8.5" x 11")
- ANSI B: 279mm x 432mm (11" x 17")
- ANSI C: 432mm x 559mm (17" x 22")
- ANSI D: 559mm x 864mm (22" x 34")
- ANSI E: 864mm x 1118mm (34" x 44")
- DXF Format:
- DXF: This format is specifically designed for importing into software.
Please note that when working with the DXF file format, it is imperative to download a free sewing pattern first and test if it can be successfully imported into your specific software. Software standards may evolve, and it's possible that your software may require the DXF AAMA format. It's always recommended to verify compatibility before proceeding with the DXF file.
- DXF: This format is specifically designed for importing into software.
Remember, each format has its own advantages, and you can choose the one that suits your needs. Don't forget that with every order, you'll also receive an SVG file for software import and an AR Viewer File. Happy sewing!
STEP 2. PRINT OUT THE FILE.
To open your PDF pattern, please use Adobe Reader software. You can download Adobe Reader for free at this link: https://get.adobe.com/reader/.
Your customized sewing pattern will arrive as a multi-page PDF file. The first page will display the layout of the pattern pieces on subsequent pages. While the program optimizes the placement to minimize unused space, there may still be some unoccupied pages. You can choose not to print these blank pages and only print the filled pages. When printing the pattern, set the zoom option to "No scale" or "100% scale," depending on your printer model.
It is recommended to print the first page first and check if the square sides measure 10 cm accurately. The bottom edge of the square also features an inch scale. If the measurements appear smaller or larger, adjust the zoom settings until the desired measurements are achieved.
Please note that there may be frames around the actual page area, which is normal. Pay attention to the positioning of the file contents on the page, especially if you have selected the universal A4/Letter format. This format includes only the printable area, with the printer adding margins. If necessary, you can recenter the printable area using the advanced settings of your printer.
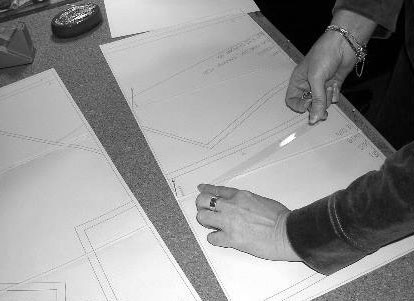
STEP 3. LAY OUT THE SHEETS IN THE CORRECT ORDER.
You will receive a separate readme file that includes the layout of the pattern pages. This file contains a numbered chart showing the order in which the pages should be placed. Additionally, the chart displays the draft lines of the pattern pieces that would be drawn on each page.
Please trim the top and/or right margin of the pages where you see the scissors symbols. In the center of each page, you will find a number indicating the row and column, separated by a slash (/) sign. Use these marks to lay out the pages. For example, a page marked as 2/3 should be placed in the second row and third column.
Trimless Formats for Multi-Page Files:
When you order a trimless format, you don't need to cut away the margins on the paper. Instead, you can simply tape the pages together right off the printer. Even if your printer doesn't support borderless printing, only a few millimeters of lines will be invisible. You can easily correct this on the paper or when cutting out the sewing pattern.

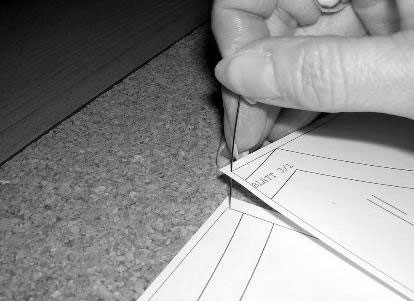
STEP 4. PIN THE SHEETS TOGETHER.
For precise assembly, it's recommended to use a cork sheet or foam plastic sheet. Place the cork or foam sheet on a solid surface, such as a table, and position the sheets to be pinned on top of it. Match the corners of the frames on the pattern pages and run a pin through both corners. This will keep the pattern sheets flat on the surface, preventing them from hanging on a pin.
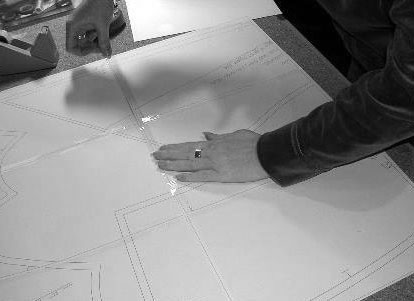
STEP 5. APPLY ADHESIVE TAPE.
Once the sheets are matched and pinned, fix them together using adhesive tape along the entire matched edge. This will securely join the pattern pages into a cohesive whole.
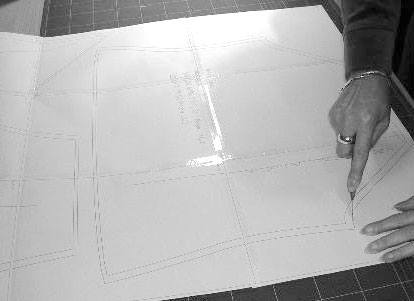
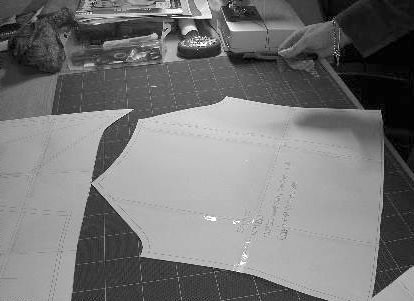
STEP 6. CUT OUT THE PATTERN.
You now have one large sheet of paper with the pattern pieces drawn on it. Use scissors or a disk knife to carefully cut out the individual pattern pieces along the designated lines.
Happy sewing!