Ordering sewing patterns in PRO mode of Sewist CAD
Welcome to the PRO mode of the online sewing pattern design tool! This comprehensive guide will walk you through each step, ensuring that you have a smooth and enjoyable experience customizing your sewing patterns. Let's dive in:
Accessing PRO Mode
To access PRO mode in the online sewing pattern design tool, please follow these steps:
Register as a user at Sewist.com: PRO mode is an advanced feature exclusively available to registered users.
Purchase Sewcoins: Sewcoins are credits that allow you to unlock and utilize the features in PRO mode. When purchasing Sewcoins, you have the opportunity to buy them in lots at a discounted price. Buying in lots not only makes it more economical for you as a sewist but also ensures you have enough Sewcoins to fully enjoy the benefits of PRO mode.
Wait for processing: After completing your Sewcoin purchase, please note that it may take several minutes for your order to be processed. During this time, the Sewcoins will be added to your account balance. You can check your balance either by logging into your user account on Sewist.com or by visiting any sewing pattern's page where your balance will be displayed in the upper right corner.
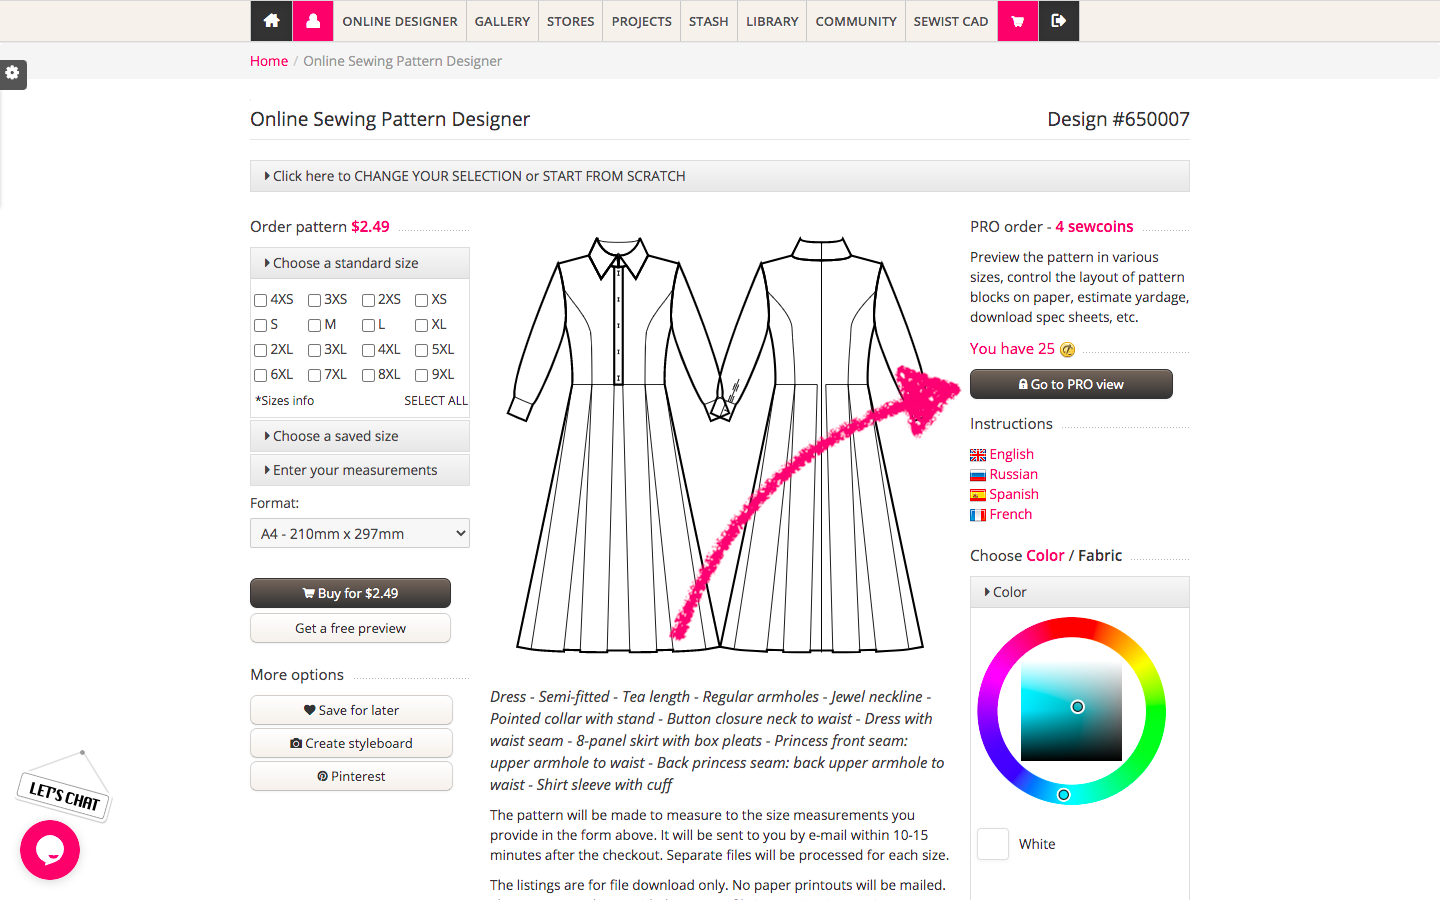
Locate the "Go to PRO view" button: On the left side of the screen, you will find a dark button labeled "Go to PRO view". Click on it to enter PRO mode. This will enable you to enjoy the advanced features and functionalities available in PRO mode.
Exploring the Working Area
In the working area, you have various options to explore and interact with your sewing pattern preview. Here are the options available to you:
- Zooming::
Use the "+" icon to zoom in and get a closer look at the sewing pattern details.
Use the "-" icon to zoom out and see more of the sewing pattern at once.
Click the "(1)" icon to show the entire sewing pattern within the screen without zooming.
- Scrolling:
Click, hold, and drag the pattern to scroll and navigate through different areas of the sewing pattern layout.
This allows you to explore the sewing pattern in more detail and focus on specific sections as needed.
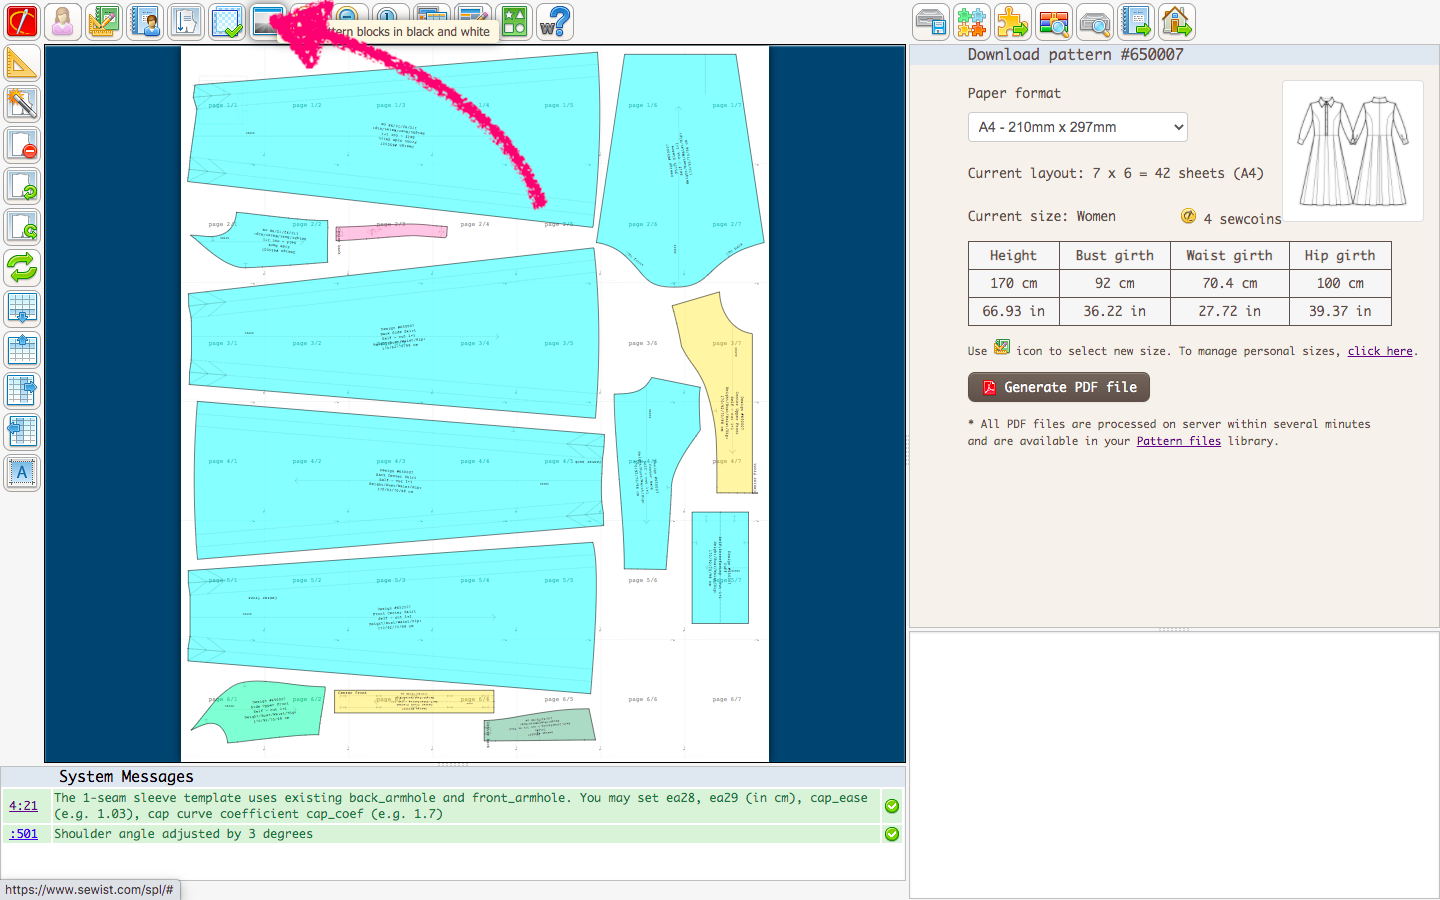
Preview in Color: Enhance Visibility and Review Your Sewing Pattern
To make it easier for you to see and work with your sewing pattern pieces, simply click on this icon -  . This will apply color highlighting to your pattern, making it more visible and helping you distinguish between different pieces and elements on your screen.
It's important to remember that when you save the pattern as a PDF, it will still be in black and white. The color highlighting feature is just there to make it more convenient for you to work on the screen.
Once you have made all the necessary adjustments to your sewing pattern, you can click the icon  again to preview the final black and white version that will be exported to PDF exactly as you see it.
Seam Allowances: Customize and Print with Precision
When working with sewing patterns in Sewist CAD, it's important to note that the seam allowances are preset by our team and cannot be adjusted at whim. However, we provide you with the option to print the sewing pattern without seam allowances if you find them too wide or too narrow for your liking, or if you want to save paper by excluding unnecessary margins. If you choose to print without seam allowances, please remember to add them to your fabric manually during the cutting process. This ensures that you maintain the required seam allowances for accurate construction of your garment.
Removing Seam Allowances:
Locate and click on this icon -
 - to print the sewing pattern without seam allowances.
This option is beneficial for advanced sewists who prefer to add their own seam allowances or for projects that require precise seam placement.
When you click on the button to print the pattern without seam allowances, the software will automatically rearrange the pattern pieces accordingly.
It is advisable to make this decision before moving or rearranging any pieces, ensuring correct alignment and accurate measurements.
Including Seam Allowances:
To include seam allowances, simply click on the icon
 again.
The software will readjust the pattern pieces, incorporating the required seam allowances.
This feature offers flexibility, allowing you to switch between printing with or without seam allowances as needed. Enjoy the freedom to toggle between different options and achieve the perfect fit for your garment.
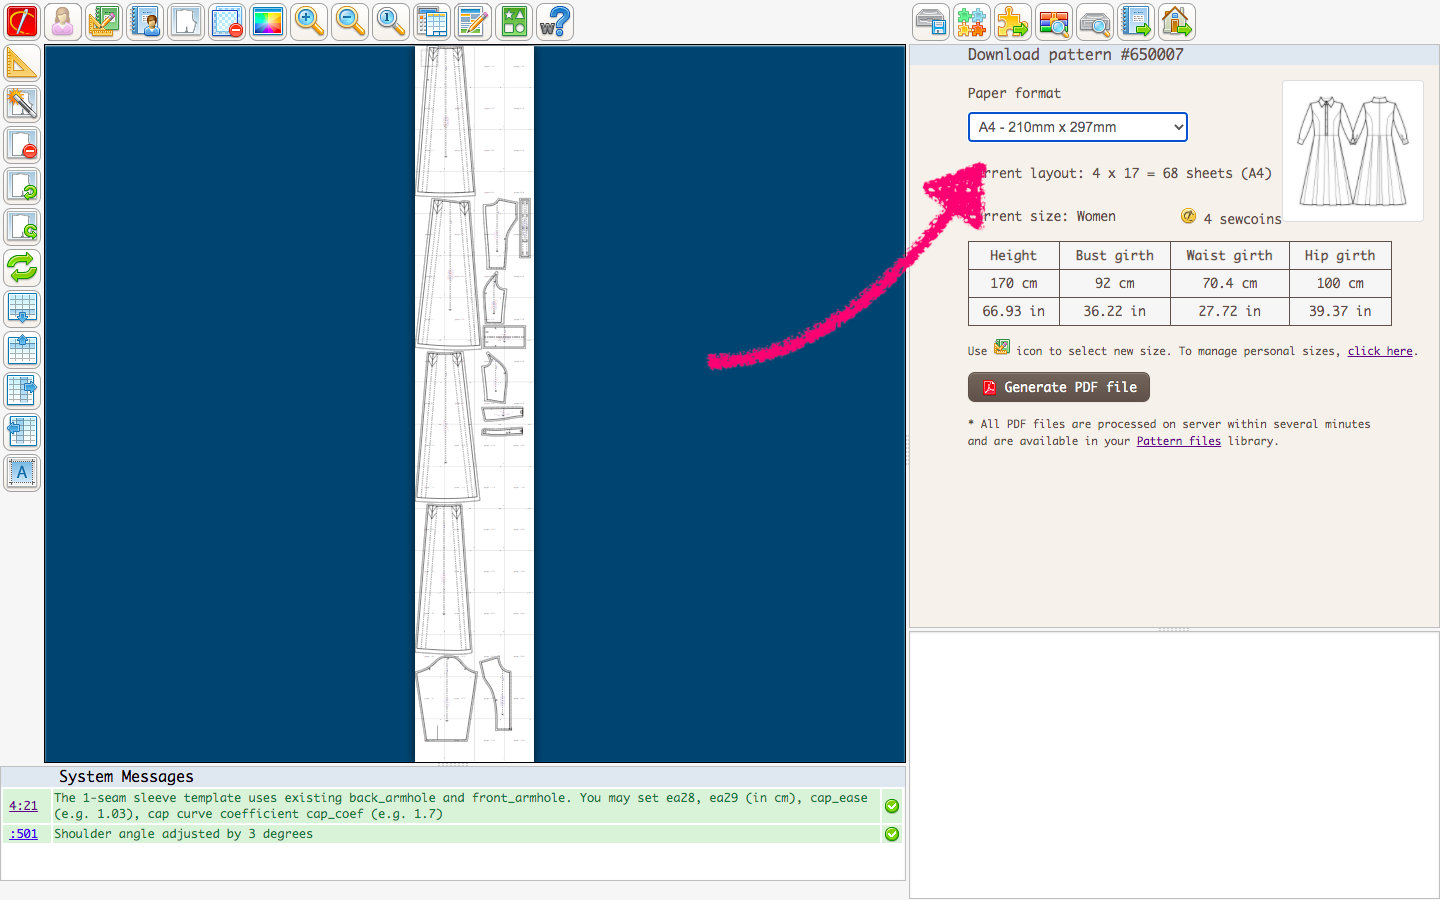
Sewing Pattern Format and Number of Sheets
Choosing the right format for your sewing pattern and organizing the sewing pattern pieces onto sheets is crucial for an efficient pattern layout and printing. In PRO mode, you have complete control over these aspects.
- Selecting the Format: Find the dropdown menu on the right side of the screen. This menu allows you to choose the paper format that best suits your needs for printing the sewing pattern. Click on the dropdown menu to see the available options and select the format that matches your printer or printing preferences. The sewing pattern layout will automatically adjust to fit the chosen paper format, ensuring that the pattern pieces are properly scaled and arranged on the paper.
- Automatic Arrangement: To optimize paper usage and minimize waste, take advantage of the automatic marker layout feature. Simply click on the icon that represents automatic marker layout -
 . This feature will efficiently arrange the sewing pattern pieces on the paper, ensuring efficient cutting and maximum use of space.

- Customized Arrangement: If you prefer a more personalized arrangement of the sewing pattern pieces, you have the flexibility to manually rearrange them. This allows you to make the most of the available space and reduce the effort required for assembly. To do this, click on a pattern piece, hold your mouse button, and drag it to your desired position on the paper.
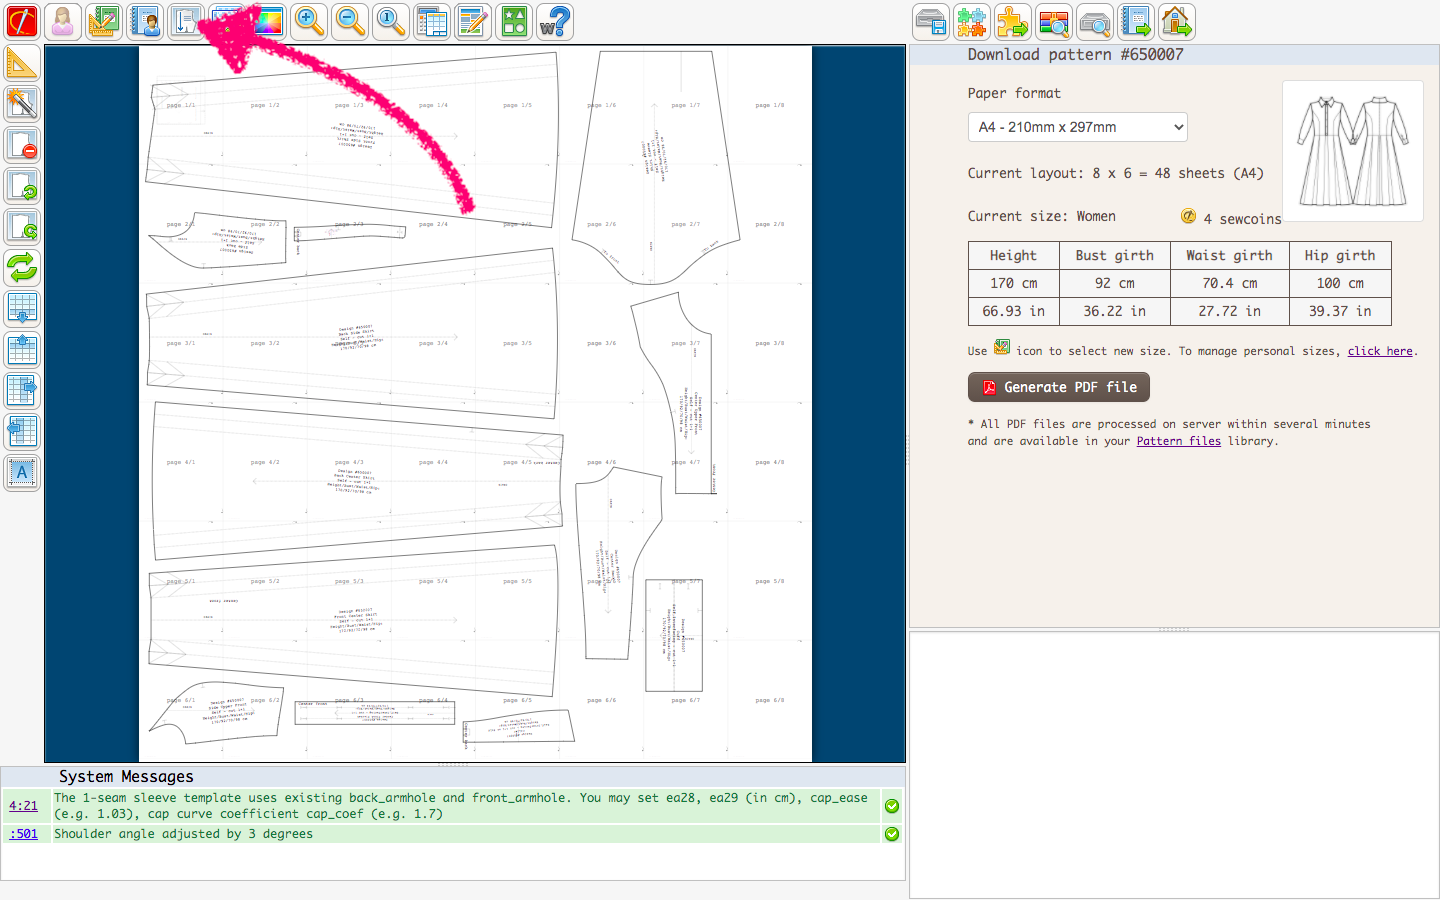
For example, you can strategically place a pattern piece between two pages instead of spanning across multiple pages. This minimizes the number of large pages you need to tape together, especially for larger formats like A0, where the pages can be quite large. This makes the assembly process more efficient and saves you the hassle of dealing with long edges when taping the pattern pieces together. - Adding Rows or Columns: If your sewing pattern requires additional sheets to accommodate all the pattern pieces, you can easily add rows or columns of sheets. Look for the buttons with the following icons:

 to insert new rows and
 to insert new columns. Simply click on the respective buttons as needed to add more sheets and expand the layout area for your sewing pattern pieces.

- Removing Pages: On the other hand, if there are any unused pages that you no longer need, you can remove them to streamline your printing. Simply click on this icon -
 - to delete any unnecessary pages from your sewing pattern layout. It's important to note that if you accidentally forget to remove extra sheets, our software is designed to automatically optimize the layout and remove any unnecessary pages during the printing process. So, you don't need to worry about manually checking and removing unused pages before printing. Our system takes care of it for you, ensuring a more streamlined and efficient printing experience.
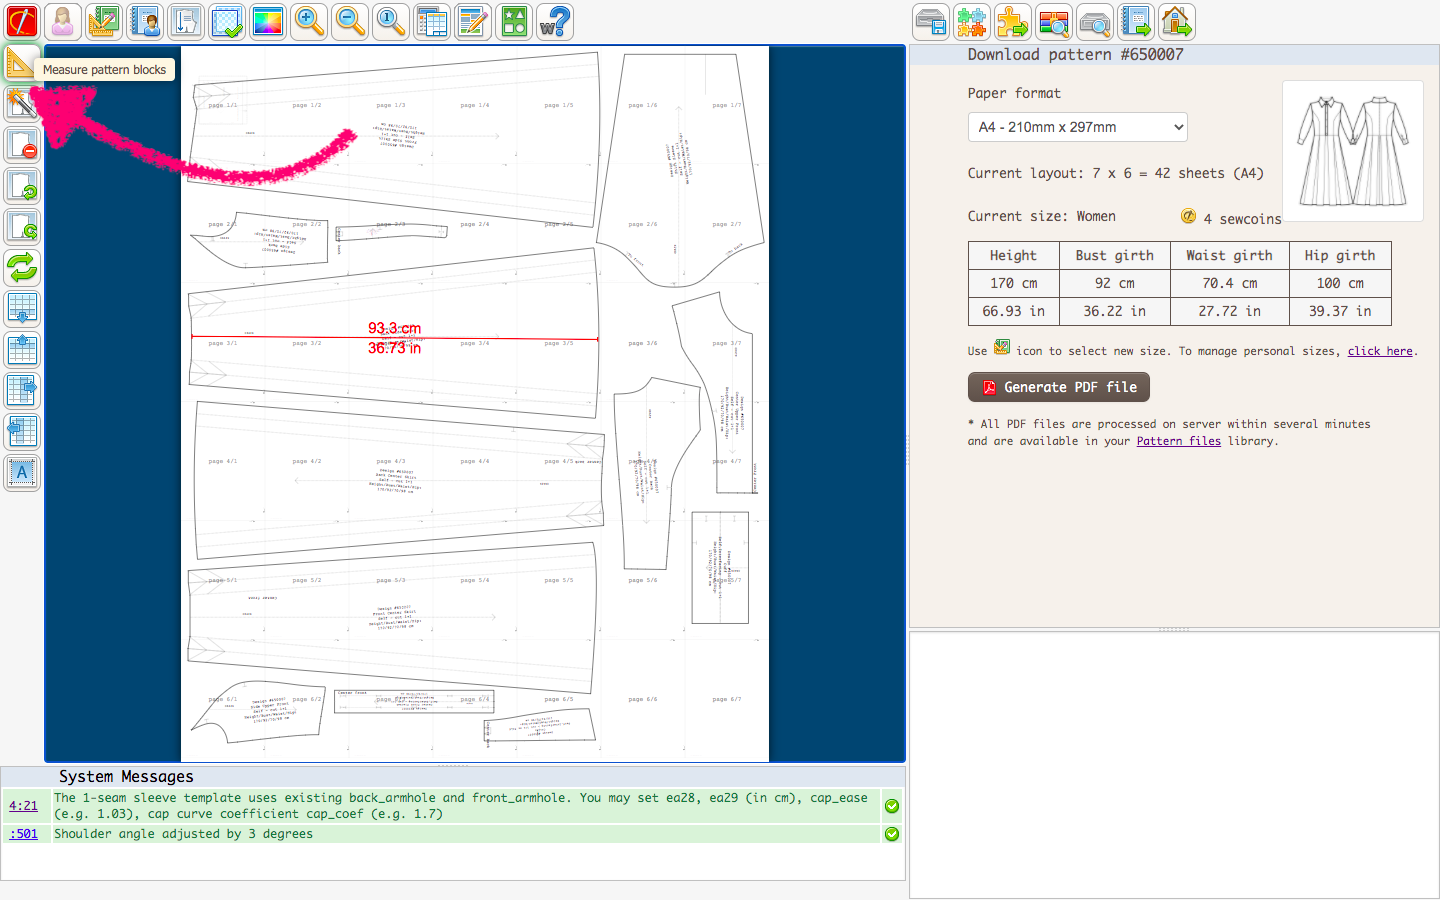
Tricks and tweaks
- If you wish to print a version with overlapped pattern blocks - so that you can print less pages and trace pieces later - click button
 and drag pieces as you wish.
 - Click
 to download specifications sheet,
  to download sewing instructions and
  to download the full list of the current size measurements.
 - To delete unwanted pattern pieces, click a pattern piece to select it and then click . To reload original sewing pattern, click .
- Click
 to estimate the required amount of fabric.


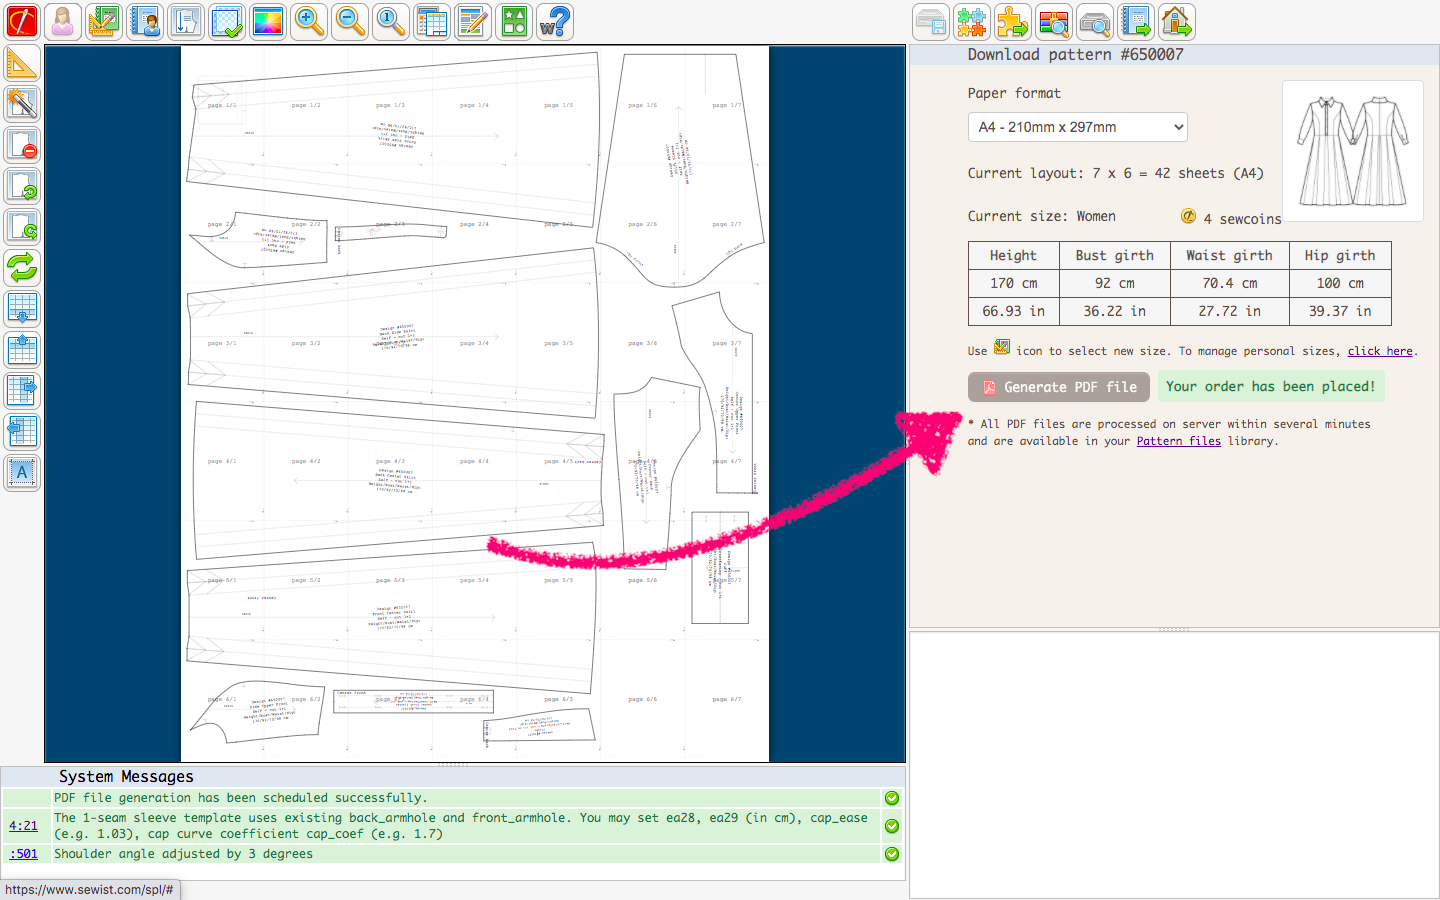
Ordering a sewing pattern
When you are happy with the pattern blocks layout, click button Generate PDF file on the right. The corresponding amount of sewcoins will be taken from your account and the button will become inactive to prevent duplicated orders for the same size and order.